DIY Smart CO2 Monitor Part 5: From Breadboard to Miniaturized 3D Printed Enclosure
After successfully integrating the SCD41 sensor in Part 4, it was time to tackle the next major challenge: miniaturization. The goal was to transform our bulky breadboard prototype into a sleek, compact device that could fit into a custom 3D printed enclosure. This journey introduced me to the world of CAD modeling, 3D printing technique, and opened up an entirely new hobby!
The Soldering Reality Check
Initially, I planned to solder everything onto a general-purpose PCB board to create a more permanent and compact solution. However, reality quickly set in when I attempted this approach.

The challenges were immediate and overwhelming:
- Poor Soldering Skills: Despite watching countless YouTube tutorials, my soldering technique was clearly inadequate for creating reliable connections
- Excessive Fumes: The soldering process generated far more fumes than expected, making it uncomfortable to work indoors
- Scalability Issues: Even if I could improve my technique, hand-soldering every device wasn’t practical for making multiple units
- Reliability Concerns: The messy connections were prone to shorts and intermittent failures
After this humbling experience, I realized that a different approach was needed.
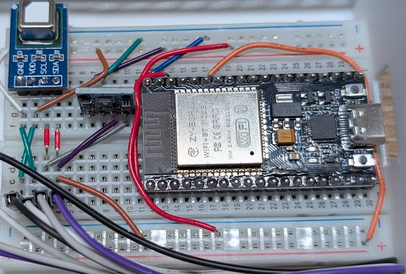
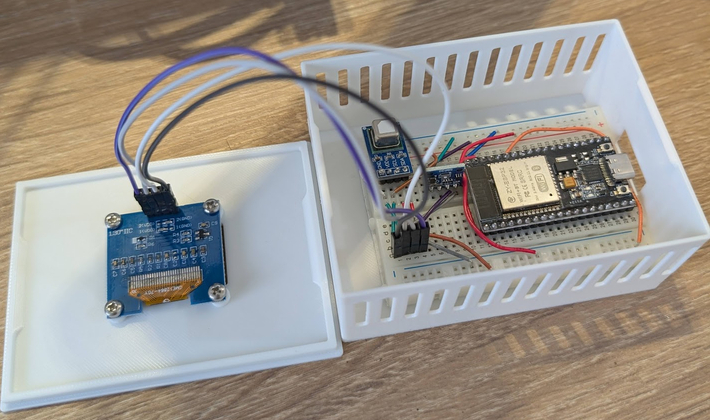
Switching to Mini Breadboards
Instead of fighting with traditional PCB soldering, I decided to embrace a more modular approach using small breadboards. This solution offered several advantages:
- No Soldering Required: All connections use jumper wires and breadboard pins
- Easy Modifications: Changes to the circuit can be made quickly without desoldering
- Reliable Connections: Breadboard connections, while temporary, are actually quite reliable for prototyping
- Compact Form Factor: Mini breadboards are much smaller than full-size ones while still accommodating our components
The trade-off was a slightly larger final size compared to a custom PCB, but the benefits far outweighed this limitation for a DIY project.
Learning CAD Design with OnShape
To create a proper enclosure, I needed to learn 3D modeling. After researching various options, I chose OnShape for several reasons:
- Cloud-Based: No software installation required, works on any computer
- Free for Personal Use: Full professional features available at no cost
- Excellent Tutorials: Comprehensive learning resources available
- Browser-Based: Works seamlessly across different operating systems
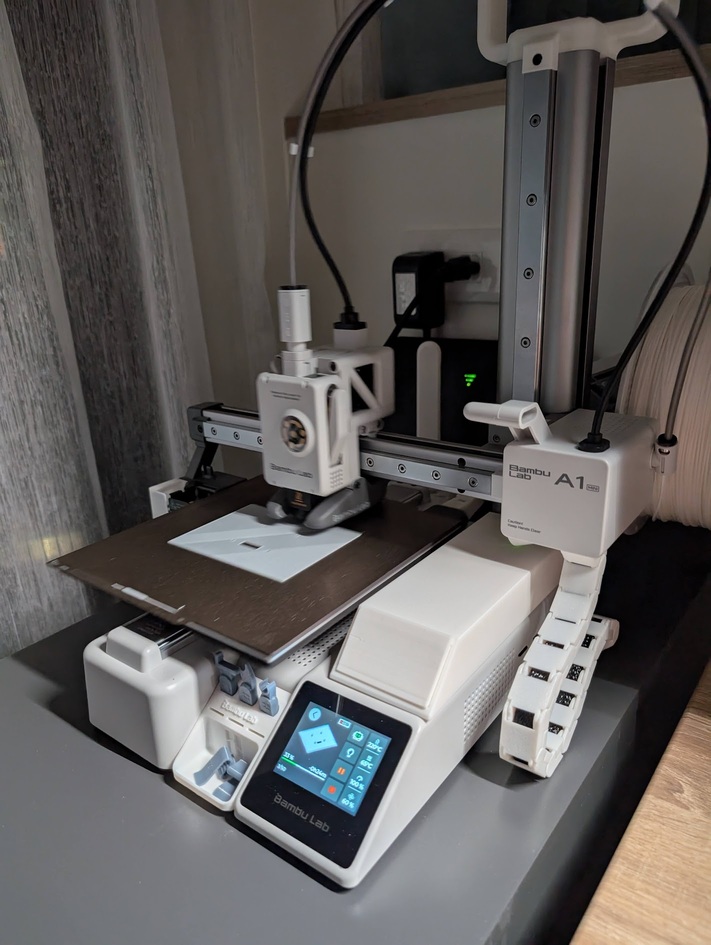
Enter the Bambu Lab A1 Mini
To bring my digital designs into the physical world, I invested in a Bambu Lab A1 Mini 3D printer. This compact, budget-friendly printer turned out to be a game-changer:
Key Features:
- Automatic Calibration: Minimal setup required for consistent prints
- Quiet Operation: Can run overnight without disturbing anyone
- Reliable Performance: Consistent quality across multiple prints
- Compact Size: Fits perfectly on a desk without taking up too much space
The 3D Printing Rabbit Hole
What started as a simple need for an enclosure quickly spiraled into a full-blown 3D printing obsession! Once I had the printer set up and working reliably, I found myself designing and printing all sorts of items:
- Custom cable organizers for my desk
- Replacement parts for broken household items
- Tool holders for my workshop
- Decorative items and gifts for family
- Prototypes for completely unrelated project ideas
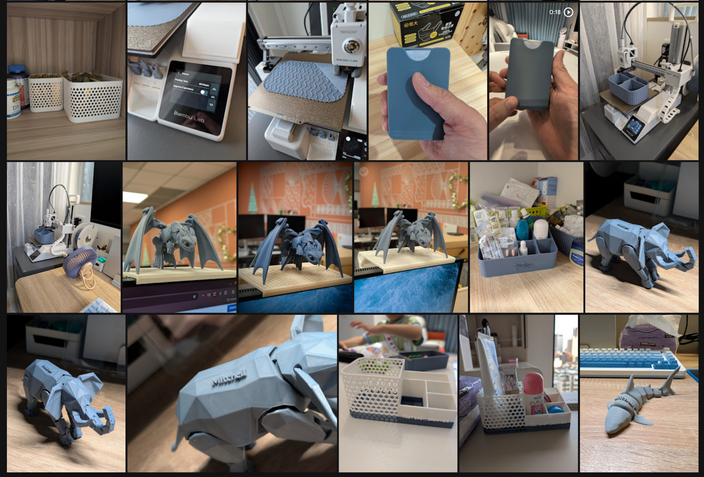
The ability to go from idea to physical object in just a few hours is incredibly addictive. I now understand why 3D printing enthusiasts are so passionate about their hobby!
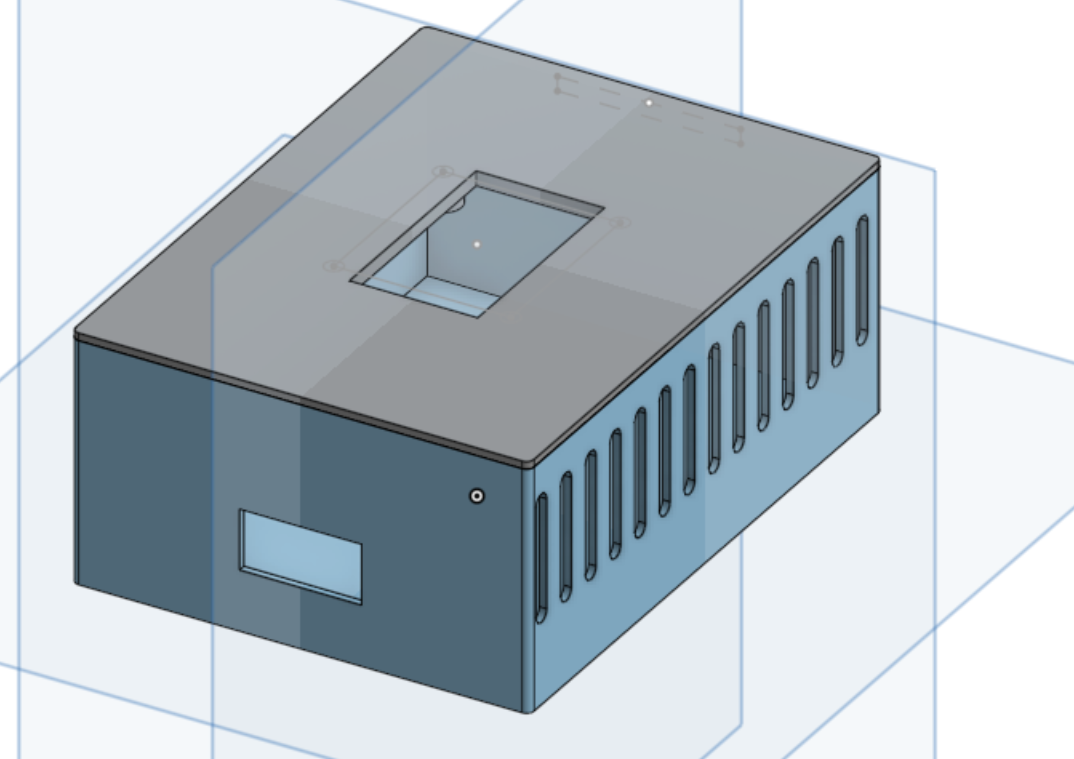
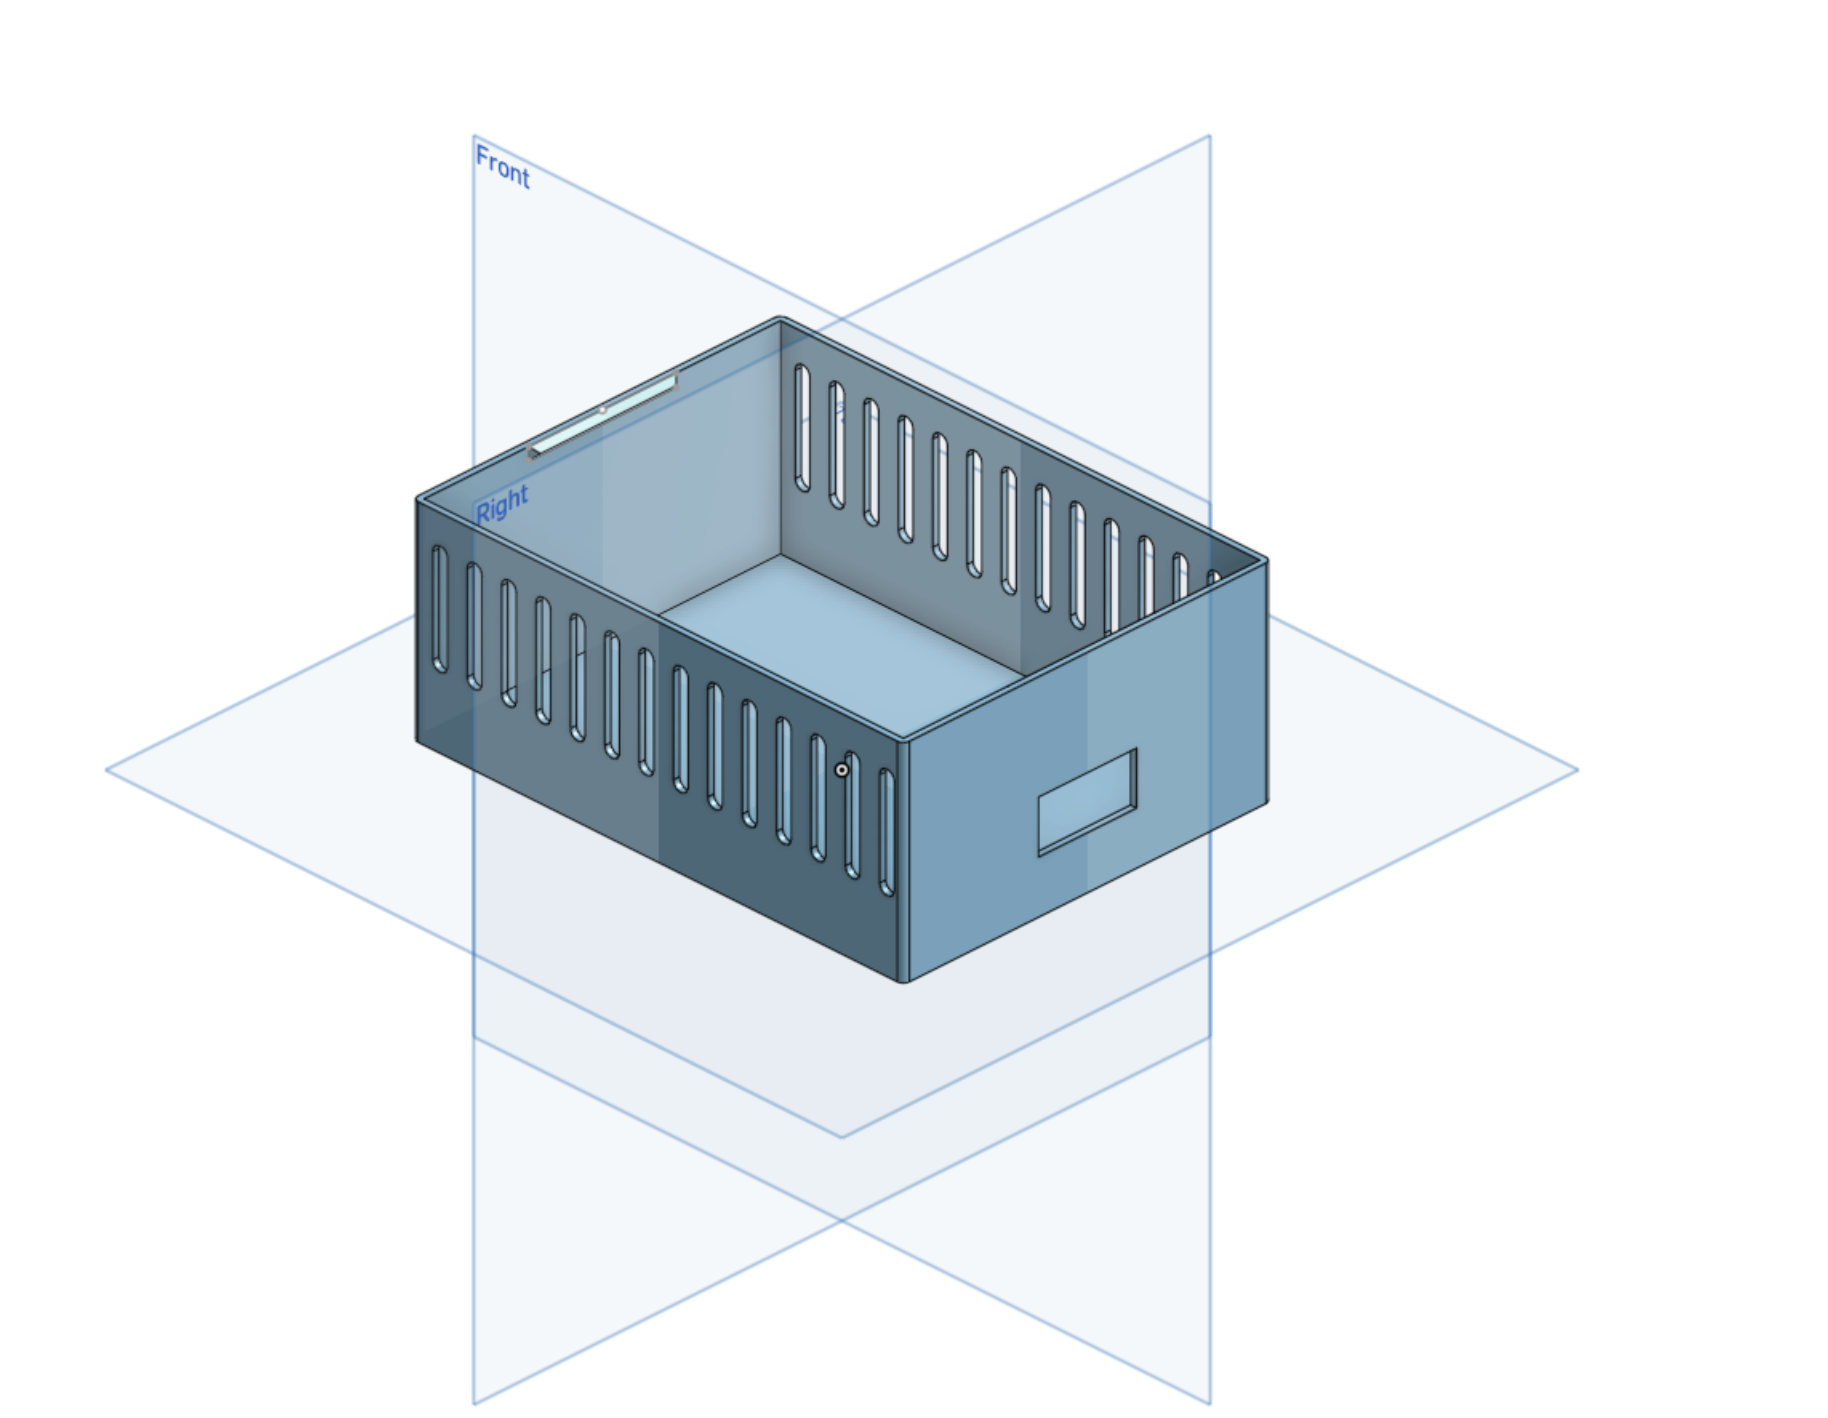
Designing the Perfect Enclosure
After getting comfortable with both OnShape and 3D printing, I focused on creating the ideal enclosure for our CO2 monitor. The design requirements were:
Functional Requirements:
- Accommodate the mini breadboard and all components
- Provide access to the display screen
- Allow for ventilation (critical for CO2 sensing)
- Easy assembly without tools
- Accessible USB port for programming and power
Aesthetic Goals:
- Clean, modern appearance
- Compact footprint
- Professional finish
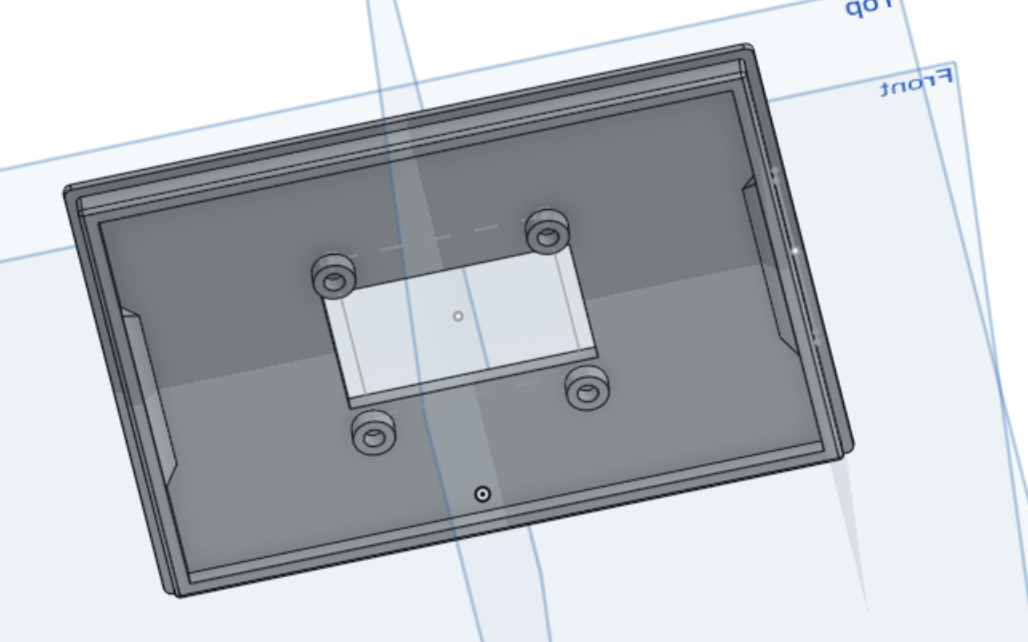
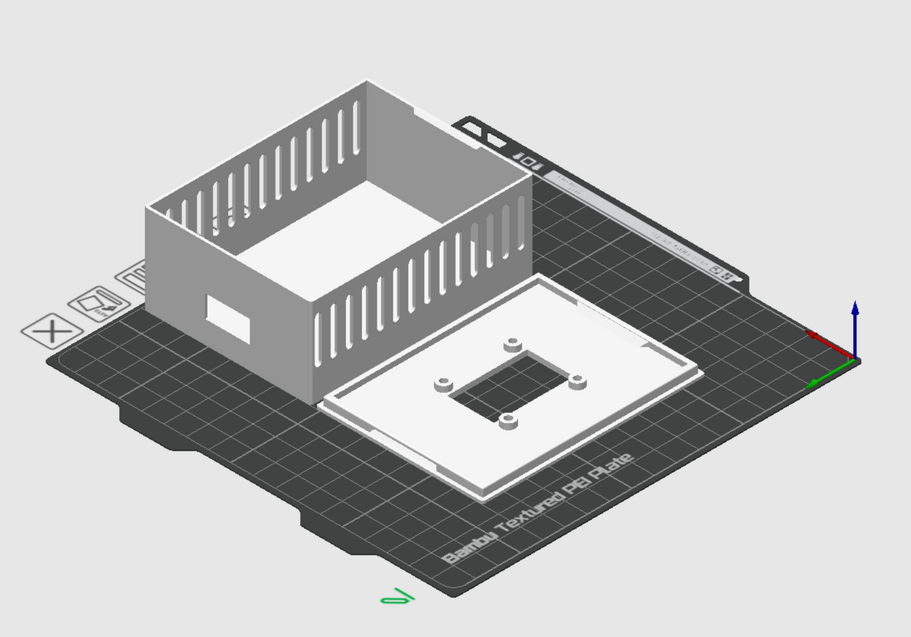
Printing and Assembly
The printing process took about 1.5 hours for both pieces, using PLA filament for its ease of use and good surface finish. The snap-fit design worked perfectly on the first try – a testament to the precision achievable with modern 3D printing.
Assembly was straightforward:
- Mount the mini breadboard in the bottom enclosure
- Route the display and sensor wires through the designated channels
- Snap the top piece into place
- Connect the USB cable for power
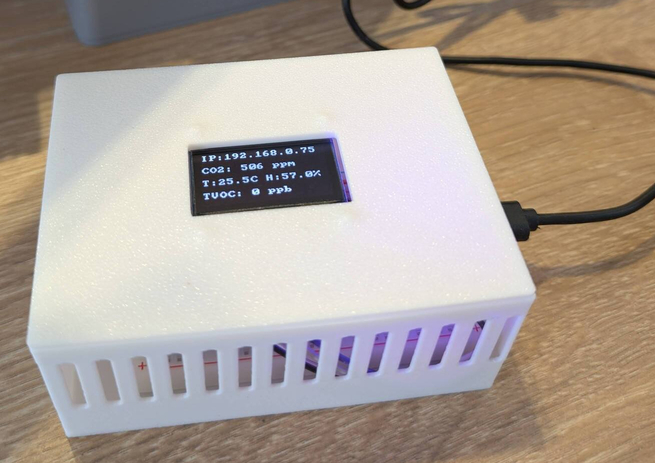
The Final Result
While the transition from breadboard prototype to a finalized product has considerable room for improvement, it’s nonetheless an interesting development.
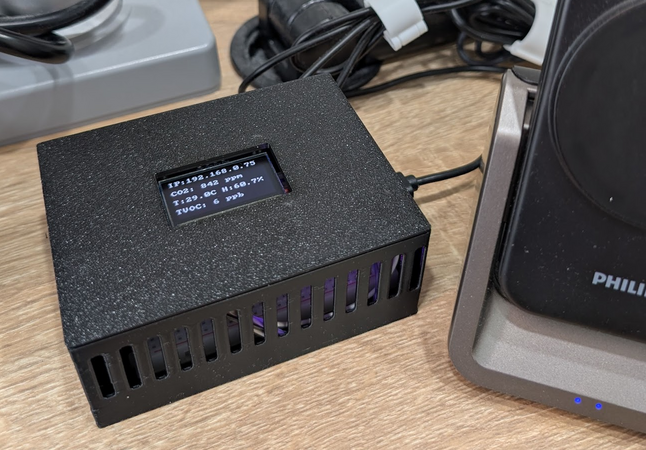
A black version of the enclosure:
Next Steps: Toward a Production-Ready Design
With our 3D printed enclosure complete, the next major milestones are designing a custom PCB to reduce size and manual work to connect the wires and implementing smart home integration. The final stage will bring Google Home integration, automated HVAC triggers, and multi-room monitoring capabilities as originally envisioned in Part 1.
Reflections on the Journey
This project has evolved from a simple air quality monitoring need into a comprehensive learning experience spanning:
- Electronics Design: From basic breadboard prototyping to planning custom PCBs
- Software Development: ESP-IDF programming, data visualization, and IoT protocols
- Mechanical Design: CAD modeling and 3D printing techniques
- Manufacturing: Understanding the path from prototype to producible design
The most rewarding aspect has been the hands-on learning across multiple disciplines. Each challenge – from poor soldering skills to CAD modeling – has opened up new areas of knowledge and capability.
Most importantly, this project demonstrates that with modern tools and a willingness to learn, individual makers can create sophisticated devices that compete with commercial products. The combination of affordable development boards, accessible CAD software, desktop 3D printing, and AI-assisted programming has democratized hardware development in unprecedented ways.