DIY Smart CO2 Monitor Part 1: The Plan & Goals
The Quest for Accurate & Affordable CO2 Monitoring
For a while now, I’ve been looking to get a reliable CO2 monitor for my home and workspace. We all know good air quality is crucial for concentration, health, and overall well-being, especially when spending many hours indoors. However, my journey into the world of commercial CO2 monitors has been a bit of a letdown.
It seems you’re often caught between two extremes:
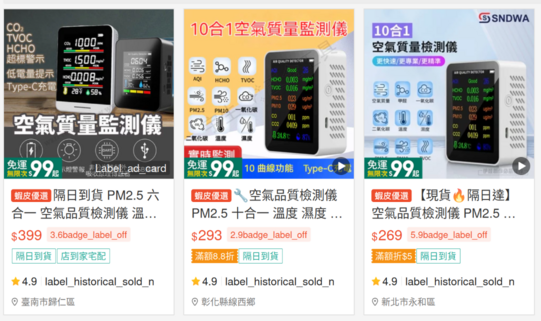
- The “Too Inaccurate” Bunch: Many lower-priced CO2 monitors, like some of the generic models you might find on Amazon or other online marketplaces, often use less reliable sensing technologies. You’ll frequently see user reviews complaining about inconsistent readings, slow response times, or values that just don’t seem to reflect the actual environment. It’s hard to trust data when it’s all over the place!

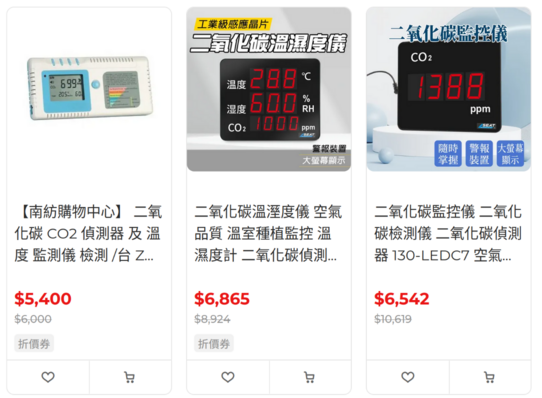
- The “Too Expensive” Crew: On the other end of the spectrum, monitors that use high-quality NDIR (Non-Dispersive Infrared) sensors and offer good accuracy, can be quite an investment (often around $200-$250), especially if you want multiple units.

This gap in the market – affordable yet accurate and smart – is what sparked my latest project idea.
My DIY Solution: A Smart, Connected, and Customizable CO2 Monitor
Why not build one myself? This way, I can ensure the accuracy I want, add the features I need, and have full control over the data.
Here are the primary goals for my DIY CO2 monitor:
- Accuracy First: Utilize a reliable NDIR CO2 sensor for trustworthy measurements.
- Internet Connectivity: Expose the CO2 (and potentially temperature/humidity) metrics over my local network and, eventually, the internet.
- Data Logging & Visualization: I want to record historical CO2 data to identify patterns and plot graphs. This will help me understand how CO2 levels change in different rooms and under various conditions (e.g., number of people, ventilation).
- Smart Home Integration: The ultimate goal is to integrate this with my Google Home ecosystem. Imagine the possibilities: automatically triggering an air circulation system or a smart fan when CO2 levels exceed a predefined threshold!
The Brains of the Operation: ESP32
After doing some initial research and considering various microcontrollers, I’ve decided to go with the ESP32 series. It’s a powerhouse for IoT projects like this because:
- Integrated Wi-Fi & Bluetooth: Essential for network connectivity.
- Sufficient Processing Power: Easily handles sensor data, network communication, and potentially a small web interface.
- Rich Peripheral Set: Plenty of I/O for sensors and other components.
- Strong Community & Ecosystem: Abundant libraries, tutorials, and community support make development much smoother.
- Cost-Effective: ESP32 development boards are very affordable.
The Development Roadmap: A Phased Approach
I’m planning to develop this project in three main stages:
Stage One: Proof of Concept (PoC) on a Breadboard
This is where the rubber meets the road (or rather, the components meet the breadboard!).
- Connect a chosen NDIR CO2 sensor (e.g., Senseair S8, Winsen MH-Z19, or Sensirion SCD30/SCD4x) to an ESP32 development board.
- Write the initial firmware to read CO2, temperature, and humidity.
- Possibly add a small OLED display for local readings.
- Implement a basic web server on the ESP32 to serve the data on my local network.
Stage Two: From Breadboard to Bespoke Enclosure
Once the PoC is validated and working reliably, the next step is to make it more permanent and presentable.
- Solder the ESP32 module, sensor, and any other necessary components (like power regulation) onto a general-purpose PCB (perfboard or stripboard).
- Design and 3D print a custom case for the monitor. This will give it a more polished, product-like feel.
Stage Three: Custom PCB & Cost Optimization for Potential “Mass Production”
This is the most advanced stage, aiming for a highly refined and potentially replicable design.
- Design a custom Printed Circuit Board (PCB) specifically tailored for this CO2 monitor. This will result in a much more compact, robust, and professional-looking device.
- Instead of using a full ESP32 development board, integrate the ESP32 IC (the chip itself, e.g., ESP32-WROOM-32 module or even the bare chip if feeling adventurous) directly onto the custom PCB. This significantly reduces the bill of materials (BOM) cost and physical footprint, unlocking the potential for easier replication or even small-scale “mass production” for friends or the local community.
What’s Next?
I’m incredibly excited to embark on this project! I’ll be sharing my progress, challenges, code snippets, design files, and any interesting discoveries right here on this blog. Expect deep dives into sensor comparisons, ESP32 programming hurdles, PCB design learnings, and the joys (and frustrations) of 3D printing.
If you’re interested in air quality, IoT, ESP32 projects, or just love a good DIY challenge, stay tuned!